Monday, January 30, 2012

Countdown till Valentine's tin

I taught a class at a crop up in Kentucky at Land Between the Lakes.  It was at a camp called Camp Bear Creek.  The ladies who took my class were such a fun group, I really enjoyed teaching them.  Each lady made a tin that they decorated as a countdown calendar for Valentine's Day.  Here are pictures of them, inside and out so you can also see the numbers that have magnets on the back so they can easily be placed on the tin and switched out each day.


I found this cute butterfly treat on Mary Brown's blog. I added the doily part over the red butterfly to make it more Valentinesey and the happy valentine's day sentiment from the Teeny Tiny Wishes set. The tag is tied on with the red and white Baker's Twine as well as the antennae tied around the middle of the butterfly.
Camp Bear Creek is on the Western shores of Land Between the Lakes.  There are 2 large parallel lakes and the land between is great for camping, fishing, boating and vacations.  You can get to Camp Bear Creek one of 3 ways, around the South end of the lakes, around the North end of the lakes or over a bridge that goes across the middle of the lakes.   We always went through the middle since it is the shortest distance.  Friday morning I woke up to the news that a barge had hit one of the bridges and 2 spans had fallen.  Luckily nobody went over the edge but we couldn't take that route to the crop this time.  I really didn't like driving over those bridges, they were old (1934), narrow and spooky.  I guess now I won't have to drive over that one ever again! 

When I started checking the distance to see which way would be fastest for an alternative route I was surprised to find out that it takes about 3 minutes longer to stay on the freeway and go around the tops of the lakes!  I wish I had known that all these years so I could have avoided the spooky bridges!  It was a great crop and it was fun creating and visiting over the weekend.

Tuesday, January 24, 2012

I finally did a layout!

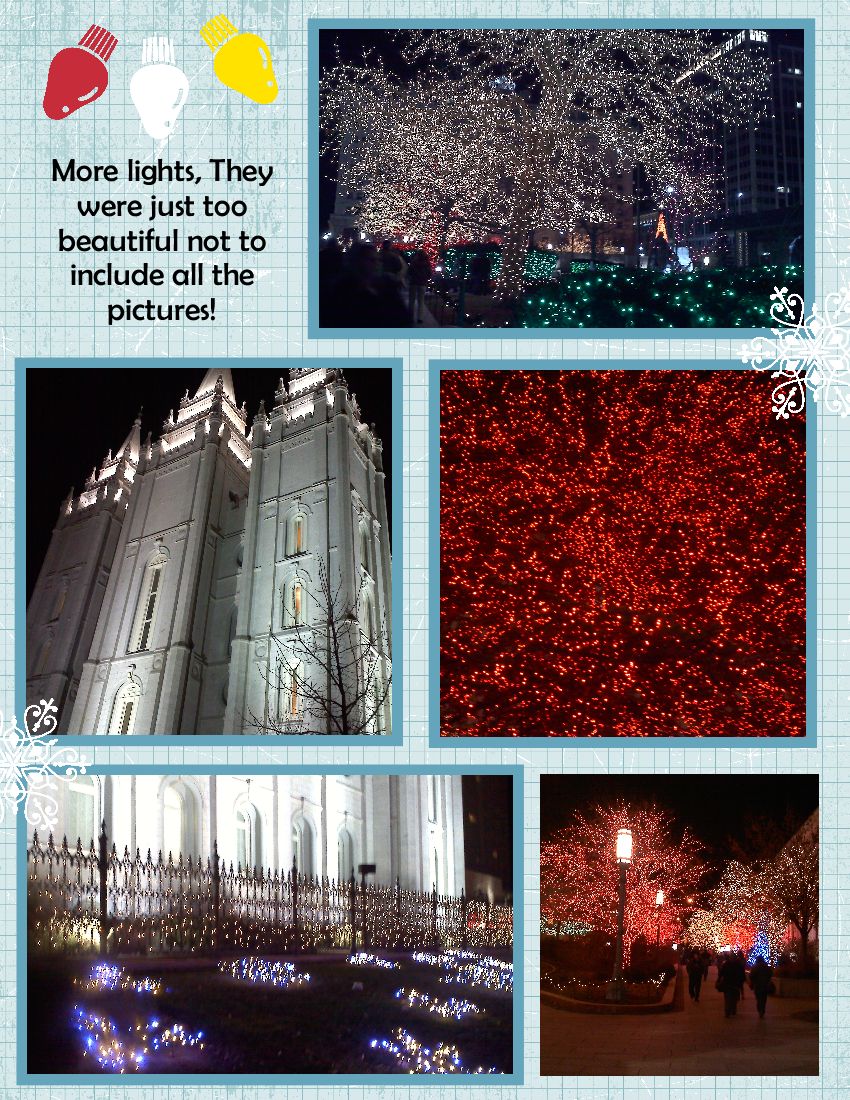
I don't think I've made a scrapbook page in 4 or 5 months.  I couldn't stand it so I decided that is the first thing I would do today.  I used some of the Sale-a-Bration Everyday Enchantment Designer Series Paper.   Speaking of enchanting, did you notice that today is Jan 24?  That means that

Starting TODAY you can choose free stamp sets, paper or brads and ribbon with every $50 you order!  If you want to earn even more free Stampin' Up merchandise, host a workshop!  If you would like to get the best deal on Stampin' Up supplies EVER, during Sale-a-Bration you can get the Stampin' Up demonstrator kit for $125 AND you get a free pack of Designer Series Paper every month in 2012! That's another $9.95 monthly value, adding nearly $120 to the value of the kit.  The Standard Starter Kit has a value of more than $345.  That means you get over $465 worth of things for only $125.  What's not to love about saving $340???  And - it all ships free!  If you have followed my blog long, you know how much I love being a Stampin' Up demonstrator.  Stampin' Up is a wonderful company to work for, this is the perfect time to find out for yourself.

There are lots of free things available during Sale-a-Bration, that is why we love this yearly promotion so much!  Please contact me if you would like to order or host a workshop and get free Sale-a-Bration items or if you want more info on joining a GREAT company and becoming part of the Stampin' Up family!

OK, now that we have taken a short commercial break, back to the layout!  I used Lucky Limeade and Soft Suede cardstock to coordinate with the Everyday Enchantment DSP.
 I love sheer ribbon and printed brads so I was really excited to see both being offered in our Sale-a-Bration catalog this year. This pack has 2 spools of ribbon, 10 yards on each as well as 30 of these cute printed brads! Did I mention that it is free?  I want to add some to this layout but haven't decided exactly how or where.  What do you think?  Click to download the Sale-a-Bration catalog, the ribbon and brads pack is on page 7.

 You can call or email me to place an order or place an online order. If you do an online order yourself, the website will automatically pop up a note saying that you qualify for a Sale-a-Bration item for each $50 you order. Fill in the numbers and they are ready to ship with your order! I love easy!
While we seem to be taking another commercial break, one more thing.  The backbone of my Stampin' Up business is workshops.  Workshops are fun and easy.  You just invite some friends over and clear off a table.  I'll bring fun projects for yall to make and you will get hostess gifts in return.  We are very generous with our hostess program already but - yep, you guessed it - there are even more hostess gifts available during Sale-a-Bration!   The minimum sales for a workshop is $150.  You get $25 in free merchandise for that workshop but during Sale-a-Bration you also get a very cute tote bag.  Guess what, the tote bag matches the Everyday Enchantment paper  :~)   AND the trim across the top looks like it was cut with a giant Adorning Accent Edgelit Die.  Stampin' Up just thinks of everything!

Normally, when you host a $400 workshop (which is even easier during Sale-a-Bration because most of your guests will want to take advantage of the free sets) you earn $65 in hostess gifts and any full priced item at 50% off (yes, that includes the Big Shot or the Simply Scored).  During Sale-a-Bration you not only get all that, you also get a bundle of the Everyday Enchantment DSP, the ribbon and brad bundle AND the very classy Fresh Vintage Stamp set!  What do you say, would you like to help both of us out and host a workshop between today and March 31?  I promise I'll bring great projects that your guests will enjoy making!

Whew, is that commercial over?  It sounds too good to be true but it is ALL TRUE!  Back to our regularly scheduled layout.  I had been thinking about ways to use the Framelit Label Collection on scrapbook pages since I got it last month.  It is a great shape and I enjoyed overusing it on this layout  :~)    I love that it has so many sizes so you can use it for mats, for small stamped images and as journaling boxes.  I also love that little girl in the pictures.  She is 4 now but she is and always has been a mischievous little angel!

Sorry for all the enthusiasm over Sale-a-Bration.  It is a marvelous time of year for a Stampin' Up demonstrator!  I reckon I can try to tone it down a bit over the next 9 weeks.  -  Well, maybe. 

Saturday, January 21, 2012

January Stamp Club Projects

The Stamp Club met this week and these are the cards we made, 2 of each of these 3 designs.  The stamps are from the Occasions Mini Catalog and I used the new Paper Doily Die, Adorning Accents Edgelit Die with the matching Embossing Folder and the Blossom Punch.  The birthday sentiment on the blue card comes with the Apothecary Art stamp set but the other 2 cards have sentiments from a set of 11 called Loving Thoughts.  I love that it is kind of fancy but not so swirly that it is hard to read. 

The green card uses the Bordering on Romance stamp set.  I love the flowers and there are also border stamps that match the Adorning Accents Edgelits and Embossing Folders.  I need to experiment more with all those great products!

The trio was finished off with the yellow Thoughts of You card.  The Blossom Punch has a stamp set that coordinates with it called Mixed Bunch.  This flower is my favorite of the 3 flowers in the set, I'm sure I'll use it most.  I was making a card with another flower in the set that has more solid areas.  It had some indentations in the rubber like it had been stored against something bumpy so I emailed Stampin' Up to tell them about it.  I got an email back very quickly telling me that they were going to send another set to replace it, it should be here Monday.  I love how quickly they work to solve any problems with heir products!   
This is the picture I sent in my email.  I thought they would understand the problem better with a picture to show how it stamped.  It was a nice card I was making with the stamp too.  I'll have to finish it up and post it later next week. 

Remember, Tuesday starts Sale-a-Bration!  You can get your free stamps by hostessing a workshop, placing an order at a workshop or online or by joining my Stampin' Up team and becoming a demonstrator.  I hope I'll be hearing from you soon!


Thursday, January 19, 2012

Paper Doily Sizzlet Die

Have I mentioned how much I like the Paper Doily Sizzlet Die?  I love the look of it and realized that it is quite versatile.  You can trim away different parts to change the look depending on your project.  I made several and trimmed them to come up with 7 different doilies.  Hummmm, which one do I like the best? 

You can use the cut away part too.  I'm thinking these would be great for stamped images punched with a round punch or as a picture frame on a scrapbook page.  What can I say, my mom was raised during the depression and she instilled in me a desire not to waste anything.  After all the work cutting, punching out the little pieces and trimming the image down it would be a shame to waste the time spent or paper used to cut these doilies.

Did I mention how much I like this die?

Did I mention that Sale-a-Bration starts Tuesday?

I love my job!  Stampin' Up is a great company to work for.  I love so many things about how they run the company and how they treat their demonstrators.  I hear there are some good changes coming up, I can't wait to see what they are.  Stay tuned  :~) 


Monday, January 16, 2012

Team Meeting Swaps

This is the swap card I made for the Team Meeting.  It uses several of the new goodies, the Adorning Accents Edgelit Die and matching Embossing Folder from the Occasions Mini Catalog and the Outlined Occasions stamp set from the Sale-a-bration catalog.  Remember, Sale-a-Bration starts next week!  I love the chance to get free stamps every year during Sale-a-Bration!

This was one of my favorite swap cards.  It was made by the wonderful and talented Mary Robinson.  I've been trying to color the flowers of the Bordering On Romance set as pretty as she did hers but no luck so far.  I want to CASE this card for my card club this month so I need to practice coloring!  The Bordering on Romance set as well as the Paper Doily Die come from the new Occasions Mini Catalog.  Did I tell you how much I ordered from that new catalog?  Well, it's a huge secret that I'm not sharing but I had such a hard time deciding what to get that I just decided to ignore the logical business sense that I usually use and had a LOT of fun ordering.  Twice. 

This card doesn't use any of the new products but I really like it.  The large floral image from the Day of Gratitude set that she used here reminds me of the flower from the new Mixed Bunch set though.  I've seen so many cards made with this image that I can now recreate with the Mixed Bunch stamp.  I can tell it will be one of my favorite stamp sets!

Last, I thought I would share a couple of Valentine cards I got.  This one is simple yet beautiful.  Wanda Vaughn made this using the Heart Framelit upside down so she just got the imprint not cut out.   You would want to stamp the "Love" on the card before "embossing" it.  These framelits let you see where you are cutting so it is easy to get the placement where you want it.

I like the technique here of sponging using templates she made with the Heart Framelits dies. She didn't put her name on the back so I don't know who to give credit to for this card.  I'm thinking about all the sponging she had to do to make 25 of these cards!  Sounds like something I'd get myself into, huh?  Do you like the "from my heart to yours" sentiment?  It comes from the new P.S. I Love You stamp set.  It is a set of 15 stamps so you should be able to design a Valentine for everyone on your list with this set. 

My card club meets this week, I'd love to have you join us!  Email me if you would like to come and see how much fun we have.  wrightplace4@ mindspring.com 
 I'll also be having a Valentine's Countdown class on Jan 31. Details for both of these classes are on my website.

Saturday, January 14, 2012

Team Meeting Projects

Last Saturday I went to a Team Meeting for Stampin' Up demonstrators.  It was a great meeting, I learned a lot, got some great swaps and made 3 cards, a candy wrapper and a shadowbox frame piece of art.  I always love the stamping projects and these were great projects.  All of the projects we made used new stamps and products from the Occasions Mini Catalog.  If you don't have one, you need one!  Let me know and I'll get one to you.


 The first card uses Crumb Cake, Concord Crush and Old Olive cardstock to create the card base and flower.  All are embossed for extra dimension but the flower parts are also wadded up and inked to give them even more dimension.  The stamp is from the Apothecary Art stamp set and after we colored the flowers we spritzed the piece with the Color Spritzer Tool.  This is a great little tool that you use with one of our markers to spray ink on projects, either finely like I did or more heavy splotches if you want a different look.  It is great to distress your project.

I changed this card up a bit from the sample we were working from.  It had the other side of the Sweet Shop DSP we used had cupcakes on it but one of the swap cards I got was very similar and used that side so I flipped it over and used the little cherry images for my card.  The cupcake stamp set is called Sweet Cake and the so sweet sentiment is also from the set.  A bit of ruffled ribbon and some glimmer paper accents finish up this "sweet" card.

I love the rectangles of 5 different prints from the Twitterpated DSP used for the base of this card.  The Pleated Satin Ribbon is Blushing Bride and the stamp set is from a great new set called P.S. I Love You.  My favorite stamp in this set is a chocolate dipped strawberry, YUM!


This is a fun wrapping idea to make presenting Valentine's treats even more fun.  Just a bit of Everyday Enchantment DSP (available FREE during Sale-a-bration) and some ribbon and a cute brad, also a Sale-a-bration freebie create an irresistible goodie.  The cupid image also comes from the P. S. I Love You stamp set.

Last of all we made this vintage framed piece.  It is sitting on my piano now, it is so pretty!  The Very Vanilla cardstock was stamped with the swirly vine stamp from the Creative Elements set.  This set is in the regular Stampin' Up catalog instead of from the Occasions Mini Catalog.  The flower, butterfly, "Create" and frame strip it is on are all from the same set.  We ran the stamped background through the Big Shot with the striped embossing folder after sponging on some So Saffron ink to make it look like old wallpaper. 

Wednesday, January 11, 2012

Paper Doily Sizzlet Die

Another new product I got in my preorder is the Paper Doily Sizzlet Die.  It takes a couple of minutes to get all the little pieces out but I think you will agree that it is so beautiful that it is worth the extra time.  I love that die!  You can also cut off part of the edge and make it look different or layer part of it to give extra dimension and color to your project.

The banner that the sentiment is stamped on comes from a new stamp set called Take It To Heart.  The phrases from the new sentiment set Loving Thoughts (as well as the Happiest Birthday one from the Apothecary Art set I used here) fit in this banner as well as they do in the Apothecary Art set.  I like these sentiments, they are a bit fancy but not so fancy that you have to struggle to figure out what it says.

The paper and brad come from the Sale-a-bration catalog.  You will be seeing a lot of that over the next couple of months.  Don't forget that Sale-a-bration begins Jan 24!

More paper from the free Sale-a-bration Designer paper pack along with another doily.  Actually, even though the colors don't look the same in the pictures, the center cut out on the first card is cut from the center of this doily.  I was able to hide the hole with the Label Framelit die.  I'm not really satisfied with this card, I think I need to put something else in the center instead of the thinking of you sentiment.  If I come up with something different I'll post it.  What do you think would finish off the card better?
Sale-a-bration starts in just under 2 weeks!  It's a great time to host a workshop because you earn hostess points so quickly.  And, you will make it to the $400 level quicker so you can get the half price item.  Do you have your eye on a die or the Simply Scored or maybe even the Big Shot?  Let me help you make it happen!  Email me to find a time that works for you to host a workshop.

Monday, January 9, 2012

January Stampin' Sisters Team Meeting

We had a team meeting Saturday.  I did my swaps before I left for the funeral because I knew I would only have Friday to work on them if I waited till I got home and I would have lots of things to do that day after being away for 2 weeks.  I was asked (by email while I was in Utah) if I could make some samples from new stamps in the Occasions Mini catalog and the Sale-a-bration catalog.  Of course, I couldn't do many on Friday but I did manage several.  Here are a couple of them.

First, I used the Apothecary Art set for the focal point of the card.  The DSP is from the Sale-a-bration pack called Everyday Enchantment.  I love the soft colors in this paper.  I also used the ribbon from the ribbon/brad bundle available during Sale-a-bration. 
Next, I used a smaller design from the Apothecary Art set as well as the new Adorning Accents Edgelits and embossing folder to cut and emboss the curved design at the bottom of the card.  I love it!  There is also a scalloped edgelit you may have noticed on the top card.  They make these extra touches so easy on a card.

The last 2 are very simple but I wanted to show a couple of different ways to use the Simply Scored tool to make backgrounds.  They are so quick and easy I want to make more!  Even without the mat, the Apothecary Art set looks great.  I love this set!
Diagonal lines in each direction are easy to achieve if you put a triangle of chipboard in the corner of the Simply Scored tool to make sure they lines are straight.  You can just do a few lines in opposing corners or do lines every half inch all the way across and then add lines in the other direction.

Thursday, January 5, 2012

Stampin' Up Office displays

I had taken a tour of the Stampin' Up offices a year and a half ago when I was in Utah for Convention but my husband had never been there so I asked if he wanted to go.  He was pretty enthusiastic about it so we went on Tuesday.  He was driving and I was directing him with my handy-dandy GPS app on my Android.  When I pointed and said that is it he said "Wow!"  It is a very large building on 55 acres and is very impressive. 

When we walked in and he saw the atrium he was more profoundly impressed than he ever imagined he would be.  I knew he would love it but didn't tell him all about it so he would be surprised.  It is so beautiful and is a great place to work.  The receptionist said she would call the one who does the tours while we looked in the display/history area. 

Again, my husband was impressed.  He read all about the history and couldn't believe how quickly Stampin' Up went from a living room operation to the huge building they have today.  I told him that they operated totally in the black and he said "Dave Ramsey would love that!".  Yep, I think he will be a little more patient with my business efforts after that visit  :~)

Here are some pictures from the display area:

Yum!  Chocolates and chocolate covered strawberries.  Only problem, they are all paper!  They look so beautiful though.


See me taking a picture of this beautiful wreath?  It is made from cones cut with the Scalloped Circle die.  I might need to make one of these, if I find directions anywhere I'll let you know.  Oh, if you look closely you can see my headless husband standing beside me.

After we looked at everything (and there was so much more) in the display area we came out and the sweet receptionist told us that both of the people who lead tours were out of the office but she gave us an abbreviated tour.  The most impressive thing is the atrium in the office but I didn't take any pictures!  It is amazing, huge rocks forming a waterfall and lots of plants and trees around it.  It is more than 2 stories high with a dome roof to accommodate more growth of the trees.  There are tables and chairs around it, I'm thinking I would probably eat lunch there everyday if I worked there!

Another impressive sight is the packing and shipping area.  It is all computerized so the boxes are already assigned what goes in them as they are scanned and folded.  They go down the conveyor belts and when they get beside a product that goes in them they automatically stop and a light to the proper bin lights up.  Once the product is picked and placed in the box it continues on it's way. 
She said that everything is calculated by weight and the least variance in the total when the box is filled puts the box into an inspection station where everything is checked by humans.  No wonder there is seldom an error in my shipments!

Before visiting the offices we ran some errands and saw this sign.  I thought you would enjoy it too.

One last thing, today is the last day for the huge Clearance Rack specials.  There are still lots of good things left, did I mention there were punches there???   Also lots of ribbon, paper, buttons and even some dies!

Tuesday, January 3, 2012

More Lights and another Fun MDS layout

Happy New Year everyone!  We are still in Utah for a couple of more days so here are 2 more MDS layouts I have made from our trip.  I couldn't resist scrapbooking the rest of my Christmas lights, they are so beautiful so the first layout is  more Christmas lights from our visit to Temple Square on Christmas Eve.

The other layout is from a place South of SLC called Planet Play.  We went there the day after Christmas and it is such a fun place to take a family.  Shoot, my husband and I would have fun there without anyone else going with us!  I did keep wishing my grandchildren were here though.  They would have loved it!


Have a good day, I'll be home soon and can play with my new Occasions Mini Catalog stamps and the Sale-a-bration things I have waiting for me there.  It really seems strange to go this long without stamping!

Oh, and don't forget, today is the last day to order from the fabulous Holiday Mini Catalog!  If there was something you wanted (like the beautiful Christmas Lodge stamp set or the soon to be discontinued Stocking Builder punch and stamp set), click on the red Holiday Mini Catalog cover on the right and you can order online.

AND - just in from Stampin' Up! ..
CLEARANCE RACK BLITZ ends Jan. 5, 2012..

shop now for discounts of up to 80% off!!

 Thanks for a wonderful year everyone!