Monday, May 31, 2010

Sunflower Layout

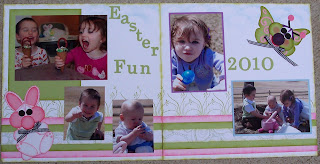
I thought I would share a layout I made with My Digital Studio using pictures of my granddaughter in a large sunflower field near our home.
I love how easy this program is to use. I am constantly amazed at how quickly I am able to finish a layout. This layout isn't complicated but I really like that it reminds me of a fun trip with my granddaugher and daughter. Christina was a little freaked out by a spider she saw but I managed to get some pretty good pictures of her that day too.
If you are interested in seeing the Stampin' Up My Digital Studio program, I'd be glad to show it to you. If you order it from me and live near me, you will get free classes to learn how to use it. In no time at all you will be creating layouts and other projects with it too!
I get a sneak peek at the new catalog tomorrow! I may not be able to sleep tonight, I reckon I'll go try though!

Friday, May 28, 2010

I really don't like it when life gets so busy that I don't have time to stamp or scrapbook! The past few weeks have been like that. Of course, during the Spring and Summer when the garden needs to be planted and weeded I expect to have less free time. I replanted 2 rows of purple hull peas today and still have a lot to replant. At least the corn is doing well! It is higher than knee deep and most of it came up and survived all the storms and floods. In no time at all I'll be canning, freezing and drying all the fruits and veggies!

In the first picture I thought I would share part of my yard. There are iris bulbs planted along my grape vines. Last year I noticed some blackberry briars in the grapes too. This year there are lots and lots of blackberry bushes, see all the white flowers among the grape leaves! We will be eating blackberries soon. I think I might need to move them to somewhere else so they won't shade my grapes too much though. Sounds like a prickly plan, doesn't it?

Anyway, I still have lots of swaps from the Spring Retreat I went to that I haven't shared. The first one was made by Ruth Hatch from Huntsville, AL. It features a set called Nature's Nest. Isn't the bird's nest beautiful? And I love the color choices for the card, Bashfull Blue, Chocolate Chip and Craft.
The second card I want to share today has a simular feel, a very realistic stamp design in natural colors. This one uses a set called Garden from the Heart in an Old Olive, Chocolate Chip and Very Vanilla color pallet. I love the hanging herbs and the wide brimmed hat. The creator of this card didn't put her name on the back of it so I don't know who to tell you made it. It is beautiful though.
I think I need a hat with netting over the face to wear when I pull weeds, there are so many gnats flying around my face every time I get in the garden! They seem worse this year than ever. It's a lot of work but I love being in my garden when I'm not stamping. I loose track of time when I'm doing either one!
The new 2010/11 catalog will be starting on July 1st. I'll be getting my copy in the next week or so and I'm very excited to see all the goodies! We are promised not only the color renovation that will bring our colors current with the latest styles but lots of new stamp sets to create with. The catalog has more pages than last year's and we will also be adding new accessories. Lots to look forward to. I hope it is delivered on a day when I have time to sit down and look at it for a long time!

Monday, May 24, 2010

Sympathy Card


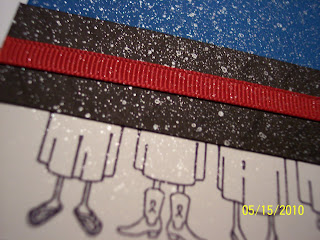
It would be nice if we never needed to make Sympathy cards but it is a fact of life. A wonderful friend of mine lost her sweet husband after a year-long battle with cancer. This is the card I made to send her. I love the Thoughts and Prayers stamp set. They are a simple design that is so beautiful and classic. There are also 4 sentiments that go with this set that say what you feel needs to be said at these times.
I also used DSP from the Cottage Wall collection and the 5/8" Old Olive grossgrain ribbon.

Thursday, May 20, 2010

Thinking of You


Here is a quick card post for today. When I first made the card I really didn't like it. The next day I saw it laying by my computer and though, this card isn't so bad. 2 days later I'm thinking that I like this card! I'm just too critical of myself sometimes. I think my main problem with it is that I want the ribbon to be farther up or down. With the way the flowers were arranged this is where the ribbon seemed to fit best though.


I used Craft cardstock for the base, cut it long wise instead of across and punched the Scalloped Border punch across the bottom. I used the Awash With Flowers stamp set, this is a preview set of what is to come in the new catalog, I can't wait to see it next month! They will be available on July 1st so let me know if you need one.


I stamped the outline of the flowers in White Craft ink and embossed them with white embossing powder. I stamped the inside of the flowers with Sahara Sand ink and added stems with the Sahara Sand marker. I used a Blender Pen to add a little Rich Razzleberry highlight to the bottom of each flower and added the Rich Razzleberry Polka Dot Ribbon. The sentiment is from the Thoughts and Prayers stamp set.

Monday, May 17, 2010

Summer Mini Catalog

Did you notice that the mini catalog on the right side of my blog turned from orange to pink a couple of weeks ago? That is because we went from the "Occasions Mini" catalog to the "Summer Mini" catalog. I joined a swap with other Stampin' Up demonstrators where we each chose a stamp set from the new Summer Mini catalog and swapped our cards (and one box). Now when I've been too busy to create something I can feature a few of the cards on my blog so you can see the great creations I received. I already posted the card I made for the swap, it was one of my creations for the Royal Blog Tour a few weeks ago. After I made it for the blog tour I decided it was quick enough to make 25 of them for the swap. I stamped and colored all the butterflies and took them with me to a dr appt and cut all of them out while I was there.

Since graduations are happening everywhere over the next couple of weeks, I'll begin with the graduation cards. There are some great graduation stamps in the catalog!


The first 2 cards feature a fun set called Go Graduate. It has 8 stamps in it with lots of sayings to go with your card. It is on page 24 of the Summer Mini catalog. The second card isn't really made on Very Vanilla, it just turned out strange, I'm blaming it on the lack of sun around here lately. It has been the rainest May in the history of recorded weather in Tennessee! While I was typing this it started pooring huge drops of rain for about 10 seconds and then stopped. It rained all weekend, why not today???

Anyway, the close up is the actual colors. I wanted to show how the silver Smooch spray looked, it's hard to pick up the metallic but you can kind of see how pretty it is.

The third card has the wonderful Medallion background stamp for the base and another graduation stamp, a single stamp on page 31 of the Summer Mini catalog called Happy Grad. I love the sentiment on this one. It's perfect for a new graduate stepping out into a promising new world.

I don't know about you, I've got a few graduation cards to go make!

Saturday, May 15, 2010

Get Well Card

I have a friend who has had to have surgery on both feet. Once last year and the other foot a few weeks ago. We were joking about it the other day and she said something about having Hoof and Mouth Disease. Well, after that, I just HAD to make her a card with a cow on it! I saw a card on Julia Bettencourt's blog that used the Round Tab punch for the base of a cow so used that as my inspiration.

I changed a few things but not much. The cased cows had smaller ears but I thought the wings from the XL Two-Step Bird punch would make dandy ears. I punched them in black and then punched the branch in Pretty in Pink and trimed the leaves to be the insides of their ears. The Small Oval punch makes their noses and I used the Crop-A-Dile for their nose and eyes. The one I cased had them reversed, the small punches for the eyes and large for the nose but I like it better this way.

I scored the Old Olive paper every 1/2" to make it look like a barn and cut strips of Whisper White at 1/2" wide for the "door frame". Stampin' Up doesn't carry the best sentiment for this card so I just typed one up, "Hope you are "hoofing" around better soon!" I think she will get a real kick out of it, I know I enjoyed making it for her! Hummm, I reckon I need to break out my White Signo and add a little sparkle to their eyes.


Edited to add: Several people have asked how I made the horns on the bull. I used the Round Label Punch and inserted the paper into the edge of the punch. I moved it in about 1/4" and punched again and trimmed the excess off then sponged Creamy Caramel on them. Easy but a little tricky!


Thursday, May 13, 2010

Swap Cards

I wanted to post a few more of the wonderful swap cards I got at the Stampin' Up retreat I went to last month. I love these swaps, you get so many great ideas!

Melany Watson always makes wonderful cards, this one features the new embossing folder that is available with the Summer Mini Catalog. I just love the dimention the embossing adds to projects. This one is called Square Lattice and has a great woven texture. Don't you love it? Mine will be here next week so you will be seeing it in a lot of my projects soon! this card also includes the new Extra Large Fancy Flower punch as well as the Boho Flowers punch and a new stamp set called Bouquet Bunch. I love that little bucket!

Next is a simple but very pretty card that uses the wonderful Cottage Wall DSP as a base. Those tone on tone green swirls are a great design. This card was made by Pamela Kroeger and includes the Whimiscal Words sentiment set 2 punches; the Scallop Square punch and the Eyelet Border punch. Pamela finished her card off with the beautiful Whisper White Organza ribbon.

The third card also uses an embossing floder. Marsha HOsner made this card with the Elegant Bouquet Textured Impressions folder. She
dotted the flowers with the white Signo Pen and stamped the fun, fancy "F" from the Vintage
Vogue with Silver Encore ink. The flowers are punched from Cottage Wall DSP and chunky glitter added to the center for more sparkle.

The Summer Mini catalog is filled with wonderful new stamp sets and other products. I just ordered 3 packages of them so if you haven't gotten one yet, let me know and I'll get yours to you. You don't want to miss out on it!

I have a scrapbook class this morning. I wish you were here, it's going to be fun!

Monday, May 10, 2010

May Classes

I have 3 classes left in May, I hope you can sign up for one of them! First, this Friday is a scrapbook class and I think you will love the layout. I posted it on April 23, the layout with the cute Garden Giggles bugs on them. LMK which critters you want on your layouts so I can have them punched and ready for you.


The class will include supplies for a 2-page 12X12 layout.


Friday, May 14 - 6:30 PM $15


I have a card class that includes a fun little purse to keep your cards in. The cards and purse are made with the very fun new Island Oasis Designer Series Paper and Tropical Party stamp set that is in the Summer Mini catalog. Click on the catalog in the right side bar to see these (pgs 26-27) and other offerings from the Summer Mini catalog.

You will make the purse and 3 cards in the class. I will have the Teeny Tiny Verses stamp set available so you can decide which kind of sentiment you want to stamp onto each of your cards. Don't you love the bright colors?

Thursday, May 20, 1:00 PM $15


I love mini albums and this one is great! It is made from half of a Simply Scrappin' kit, felt flowers, ribbons and brads and chipboard. Won't this be the perfect little album for a Summer vacation or special party?
I will need paid registration by May 17 so I can order supplies and pre-cut the chipboard.
Tuesday, May 25 - 10AM, $25
Contact me at wrightplace4@mindspring.com to sign up for any of these classes.

As always, if you see a class you want to take but the time isn't good for you, I'll be glad to come to your home at a time that works for you and teach you and a few friends!

Saturday, May 8, 2010


Want a quick and easy gift for a teacher? Wouldn't this be a great addition to the classroom or home to post messages and dates to remember! Or maybe you need a place to post messages to your family in your own home. I'm thinking I'll use mine to put a menu up each week. Maybe then I'll remember to cook when it starts getting close to supper time!
We made these cute message boards at our Stampin' Up Spring Retreat a few weeks ago. It uses just a standard cookie sheet from the $$ store as it's base. We covered it with our The Write Stuff Designer Series Paper, I love how this pack of paper comes with textured die cut journaling boxes. There are 6 sheets of double sided DSP and 3 sheets of the journaling boxes.
We used the beautiful 1 1/4" striped Grosgrain Ribbon for the hanger and punched the holes in the cookie sheet with the Crop-a-dile. It is amazing to me how it can punch right through metal! The chipboard flowers were cut using the Flower Layers #3 die. We also used the Scalloped Edge punch to add a nice border at the top and bottom.

Wednesday, May 5, 2010

Picture Frame?

I love the new Acrylic Blocks that Stampin' Up is now carrying. Everything I didn't like about all the other blocks out there are all fixed in these great blocks. I love that the grove around the block goes all the way around and that all corners and edges are rounded. They are easy to grip and thick enough not to slip out of your fingers. And - they make great frames!

I had to cut down this 4X6 photo slightly to fit on the block, I put a mini glue dot on each corner of the back of the block and placed the photo on it and then trimmed it to fit. I put more glue dots around the perimeter of the block and placed the ribbon around it. I made the bow using loops of the stitched grossgrain ribbon and adhered them all with more glue dots and a simple butterfly from the Beautiful Wings embosslet finishes off the frame.

If you didn't have so many people in the picture you could get more creative with flowers (wouldn't one of the 3-D roses from my previous post look great in the corner) or some stamped images. I used the E block for this picture which is 3 7/16 X 4 7/16. The F block is a great size for snapshots since it is 4 7/8 X 6. That leaves room to mat the photo if you trim the sides a little.

I also wanted to share a couple of flood pictures. Our house is fine but it has been very interesting around here the past few days. I was in Murfreesboro at a National Scrapbook Day crop on Saturday. We were under tornado warnings part of the day and we left a little early so we could get home before dark. Just before we got into Nashville the freeway was backed up so we got off and tried to find a way around what many of you saw on the news, water was so deep on I24 that is was over the retaining wall between lanes! It normally takes 1 1/2 hours to get to Clarksville from Murfreesboro. Saturday it took 4 1/2 hours! We were beginning to think we were going to have to find a motel (at least we had our scrapbook supplies to keep us busy) but we finally found a way through that wasn't flooded.
The top left picture is where our camp house by the river is. You can't see the camp house, the water is completely over it! Usually when you are standing where I was to take the picture you can't see any water at all. The camp house is 20-30 feet above the river.
Lower left is a picture of some of my corn. Many kernels were laying on top of the ground. I stood the little stalks up and put dirt around the base, they look a little rough but like they will survive. The poor things! I had to re-cover some of my butter beans and peas too, I may have to plant more seeds, I'll see what stays strong and what doesn't make it.
The top right picture is of Riverside Drive here in Clarksville. You can't actually see the road but it's there underwater, along with many businesses. What a mess they have been cleaning up! The lower right picture is of the bridge we usually drive across to get to town. It was nice to have an excuse to stay home a few days! Our home and family are doing fine and we have so much to be thankful for. Life is good :~)