Showing posts with label layouts. Show all posts

Friday, April 23, 2010

Garden Giggles Layouts

I knew when I ordered Gretchen Baron's Garden Giggles directions that I needed to do a layout with these cute critters. Easter and Spring pictures gave me the perfect opportunity to try them. I designed 2 layouts for my scrapbook club, one had pink and the other was blue. The pink layout features pictures from the Easter pictures I got of some of my grandchildren. The bunny I copied from Nancy Dawson was great for the lower corner of this layout.

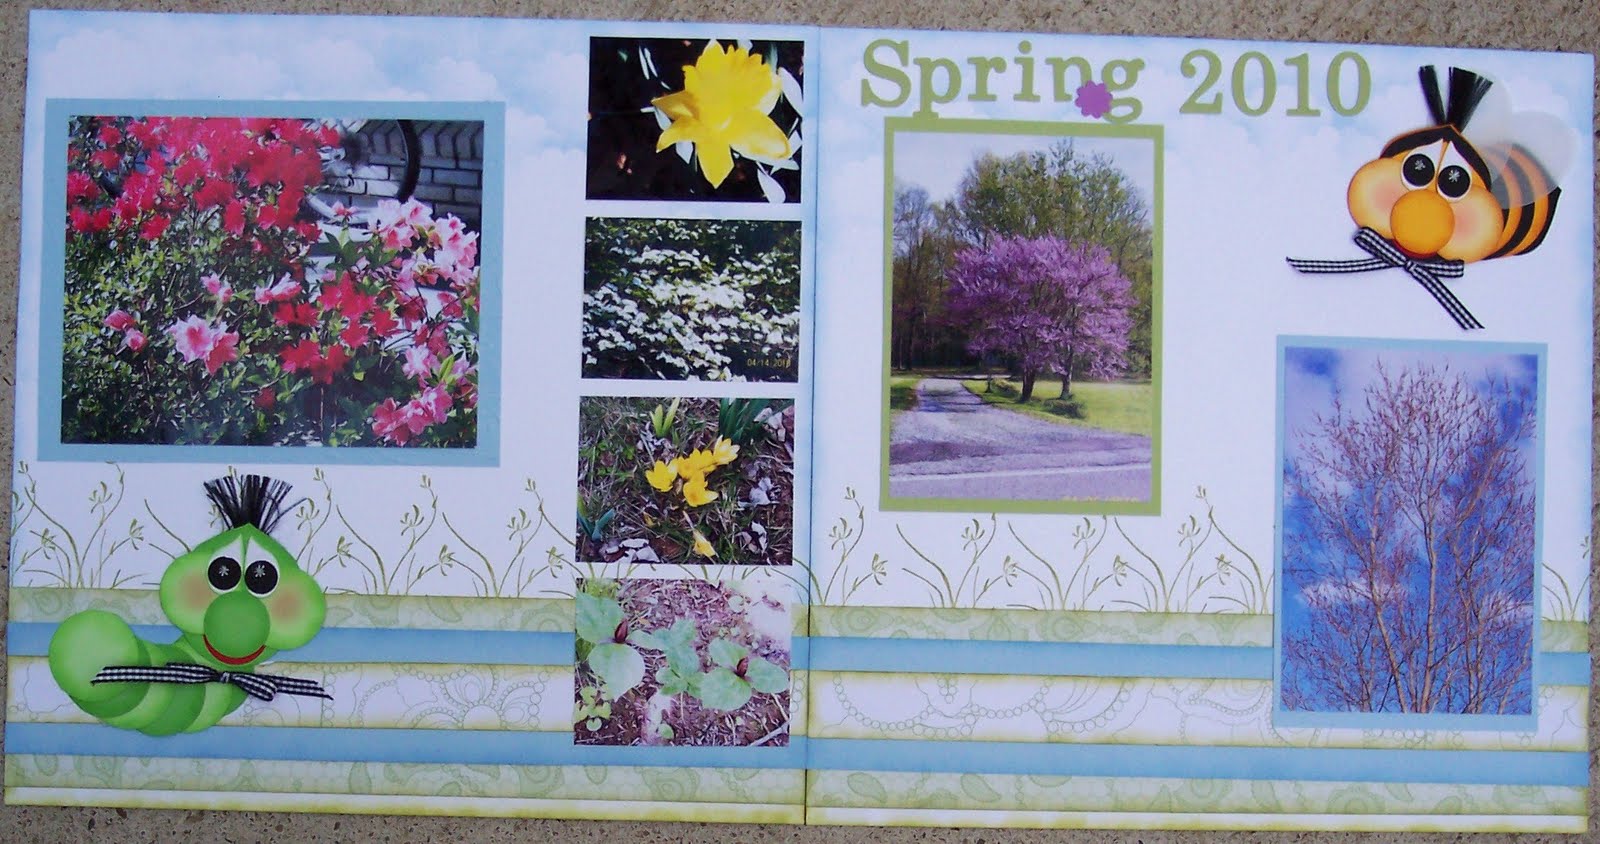
The other layout features pictures I took in my yard of some of my spring flowers. I think it must have been the long, cold, snowy winter we just went through but I was so excited to see spring come! What do you think, were these cute critters perfect for the layouts?

I used the beautiful Shades of Spring Designer Series Paper for the strips of paper at the bottom of the layouts. This beautiful paper is in the Occasions mini catalog which expires April 30. The stamp stamped in Certainly Celery above the strips of DSP is from the hostess set called Asian Artistry. If you look closely at the top of the layouts you can see that I sponged clouds using the Scalloped Flower punch and Bashful Blue ink. I also embossed the 5X7 piece of cardstock on the first page with one of the Texture Plates from the Backgrounds 1 collection.
The titles were cut with the Timless Type Alphabet Junior die cut set.

Wednesday, March 11, 2009

Stamp meeting Saturday

I went to a Stampin' Up team meeting Saturday and we learned a lot and did some fun projects. We also did a card swap. One of the things my upline did was give us part of a birthday scrapbook kit and told us to do 2 pages in 15 minutes. Panic!!! Talk about pouring on the stress. My brain seemed to immediately drain of all creativity! I managed to put 2 pages together that aren't great but weren't half bad either. I'll plead temporary insanity.
We didn't have ribbon, buttons or brads so they are a bit plainer than my usual but hey, I discovered you can do pages without those things. On the other hand, I'll probably add some when I add pictures.

On the second layout I made a border with the white paper and layered green on top of it. If you cut out the middle of the bottom (white) layer you will save paper. A lot of you probably already know how to do this but I thought I'd show how to do it for the ones who have never tried this.

First, I put the paper I'm using for the piece behind (white) in the trimmer, 11" in and cut from 1" down to the 11" mark. You don't cut all the way through the piece, leave an inch at the top and the bottom of the page connected. I turn it a quarter of a turn and keep turning it and cutting until all 4 sides are cut. I hope that makes sense. You should have a 10X10 square cut out of the center of your cardstock. Then instead of that large piece of cardstock being hidden by the top cardstock, you can use it elsewhere on your page like I did the background squares for the cupcake stickers.

For the top piece, decide how wide you want your border to be. On the white with green layout I made the border 1/2". For the 1/2" border, cut 1" off of the top and one side of your second piece of cardstock. For a 1/4" border, only cut 1/2" off the top and side of it.

Put adhesive around the outside edges of the second (green) piece of cardstock and center it on the 12X12 frame (white) piece.

Monday, February 23, 2009

Bright Layout and Blog Candy!

I love the bright colors in this layout! Of course, the subject is one of my favorite things too. The flash glared the pictures a bit but that is my 3rd grandchild, Easton. I used Pumpkin Pie and Certainly Celery Designer Series Ppaer as well as Basic Black and Tempting Turquoise cardstock.

A fun (although slightly time consuming) technique I used on this layout that you might want to try when doing titles is to stamp an outline stamp like the Jumbo Outline Alphabet onto some of the scraps from your page and cut them out. Your title will match the layout perfectly because it is from the same paper as the rest of your layout. When cutting out letters that have centers like b, e, o etc, just use a hand-held circle punch to make a hole that you can get the tip of your scissors into to trim it out to the line.

I cut lots of circles and layered some of them and tied knots of coordinating ribbon here and there to finish out the layout. Then, when I had it all put together I took my white Signo pen (I love that thing!) and dotted around EVERYTHING. If you click on the layout it will bring a bigger image and you can see the dots. It really finishes off the layout nicely and didn't take that long. You might have to stop every few minutes to uncross your eyes though!

Hummm, I'm thinking I should give something away a lucky person who posts a comment about my layout or my blog in general. I'm trying to make my blog mostly stampin' Up layouts and cards but on Sunday I usually post a family post so you can get to know me a little better but not have too many non-stamping posts. I'm finishing up my second month of blogging. What do you think? What am I doing right and what could I do to improve or make my blog one you will want to visit often?

I'll have one of the grandkids draw a name from everyone who posts a comment. Your email address is not listed when you post so be sure to put your email address so I can get ahold of you if you win. I have a brand new, unmounted, never inked Puns From the Past stamp set that is a $27.95 value for the winner! I'll hold the drawing next Monday, March 2.

Good luck!