Friday, March 27, 2009

Cards with quick ribbon rose


OK, this card literally only took about 10 minutes to make. I'm finding that the Big Shot is making scrapbooking and card making so much more simple! I just cut the Raspberry Tart paper to 4 X 5 1/4 and ran it through the Big Shot Machine in the Manhattan Flower embossing folder, sanded it and tied a ribbon rose around it, mounted it on a So Saffron card with a Certainly Celery mat. After stamping a sentiment from the Cute and Curly stamp set in Handsome Hunter the card was done.

Don't you love the ribbon rose?? I found a video for it on this blog, it is so quick and easy but the perfect touch for a wow effect on a card or scrapbook page. I figured it would be better to post her link than to try to do a tutorial. It helps a lot to be able to watch her do it than to just see pictures. One of these days I'm going to figure out how to post videos. . .
The second card also uses the ribbon rose and didn't take long either. I double matted the Big Shot Top Note die cut out of Raspberry Tart paper. Then I trimmed off nearly half of another Top Note die (did I ever say how much I love that die??) and punched with the eyelet border punch. I tied a ribbon rose around it and added a sentiment from the hostess set, A Little Something.

Tuesday, March 24, 2009

Easter is coming!

I love Easter for many reasons. Of course, the first and most important is that this is when my Savior made it possible for me to gain a great place in Heaven! That's what it is all about after all. After that there are a bunch of less important reasons like spring is here! I love spring. I love the flowers blooming and trees and grass turning green again. It seems the older I get the longer winter is and the more I look forward to the warmer days of spring.

I also love the baby animals. Little chicks, bunnies and lambs are so cute and are fun to use to represent the new life. I like the pastel colors that bring to mind a new Easter dress, which reminds me, I need to go shopping for a new dress. Being a chocolaholic, Easter candy is another reason to love spring. Somehow it seems my favorite candy changes every year. What I was loving last year didn't taste so wonderful this year and what was wonderful the year before last wasn't floating my boat last year. Just me or does the candy change??


OK, on to the cards. Actually, I don't have cards but a box and a bag to post tonight. I wanted the Top Note die since I first saw it and bags like this one are one of the reasons why. I'll be posting some cards soon that will have you drooling over that die too. It was in the layout I did for the March club also. I posted the layout on Friday.

For the little bag I folded a pink die lengthwise and used punches for the ears and face. Then I stapled it onto a bag of jelly beans. I'm thinking it would look better with pastel M&M's.

The box is using the Scalloped Envelope die. I cut 4 of them and cut off one side flap of each. Then I adhered the other flap to the inside of the next envelope die until they were all together in a square. I folded the bottoms in and adhered them and folded 3 sides out.

I cut the bunny's head using the oval coluzzle template. I cut flowers and the bird from Raspberry Tart Designers Series paper and used punches to add the feet, ears and face. Notice the ears, yes, we have a scalloped oval punch!!! It will be available on April 1st. It works with the large oval punch as shown in the ears and it also fits nicely inside the wide oval punch. I just love it when things work together!

I used brads for the eyes and nose and flower centers. I didn't put any wiskers on but maybe he needs them.I still think he is cute, cute, cute!

I saw simular projects on the internet that I copied and added my touches but I can't remember where right now. I'm thinking one is named Susan. I'll have to check and post a link for you to see her work too.

BTW, Ashley, I got the quilt you sent today and I love it! You did a great job. I like the card too. They really made my day. Thanks!

Sunday, March 22, 2009

Never a Dull Moment

It sometimes seems like things are nuts around here. Friday I tried to burn down half of TN! We had a couple of piles of brush that needed to be burned and the past several days had been dry. The wind wasn't blowing and I didn't have anything else that HAD to be done instead so I raked about a 3 ft ring around one of the brush piles and lit it on fire. It was plenty dry because the blazes caught on very quickly. We burn in the edge of the woods and I usually set a big bucket of water nearby when I burn but didn't Friday. Not good! A leaf that was still on fire floated about 15 feet over and landed on more dry leaves. Boy Howdy, did they catch on fire fast! I grabbed the rake (I don't recommend plastic rakes for this but it was the only one near) and started raking and stomping flames as quick as I could. Apparently I have a very good heart because it took me 10 to 15 minutes of frantic raking and stomping to get the flames under control. I had my cell phone in my pocket but didn't dare take the valuable seconds it would have taken to call help.

If you look carefully at the pictures you can see the white pile of ashes where the brush was burned. The black area is where the fire got away from me. I'm glad the buttercups had already bloomed because I nearly took out the whole row of them!

At one point of my fire extinguishing I felt extreme heat on my leg and just knew my jeans were on fire but when I looked down they weren't. Isn't it strange how things happen sometimes, when I got through burning and raking and got back online I had 2 emails about people who were burning brush up in KY from the recent ice storms and they caught on fire. One died from his injuries and the other is in the hospital as well as her grandson who was helping her. I'm so blessed, I got some excersise and no longer need to tweeze my eyebrows!
Between falling through ceilings and trying to burn the woods down my husband and I keep things going around here!

Friday, March 20, 2009

Delicate Dots Designer paper layout

This is the layout we did for the scrapbook club last night. We used the Designer Papers that were available free in the Sale-a-bration catalog, isn't it georgous paper! It would be great for spring layouts, baby layouts, heritage layouts or many other themes.

We also used the Polka Dot Punches stamp set that is also free until the end of March. What is really cool about this stamp set is that all 4 stamps match with punches so you don't have to cut them out. Gotta love that! It would have taken a long time to cut out all those flowers and hearts with as many as I put on the layout. The ladies in my stamp group would have fired me!


I also used the Top Note die for journaling blocks and photo mats. I really love that die, as well as the Big Shot machine. I'm going to do some embossing with it when I have some time. I have this beautiful embossing die called Manhatten Flower. It is so pretty that you can just emboss the card front and stamp a sentiment and feel like it's done! I might tie a ribbon around this one before I adhere it to the card though. Look how great it embosses though. All the lines are easily seen.


Back to the layout, I stamped on Barely Banana, Certainly Celery and Bashful Blue cardstock with the Versa Mark embossing pad and embossed with white embossing powder. I love how the cardstock and the Designer Paper match perfectly along with the inks so your layouts look so great together. Did I mention how much I love the fact that these stamps go with our punches so you don't have to cut them out?? I really like that!

Thursday, March 19, 2009

Matting a Whole Layout


I posted the layout above on the left a few days ago where I matted the whole scrapbook page. This is a nice look for your page but could use a lot of extra paper since nearly an entire sheet of paper is hidden under the mat. Many of you have done this before and already know what I'm going to teach in this post but for the ones who never have, here is how to save the paper:

In the picture above I have the background (white) paper in the trimmer. I put it in 1 inch into the trimmer and cut from 1" to 11". DO NOT CUT ALL THE WAY TO THE ENDS! If you look closely you can see where I cut the first 2 sides of the cardstock.


When you trim all 4 sides you have an 11X11 inch square cut out of the middle. This can be used to mat pictures or for other page elements. This is what I used for the mats under the cupcakes in the layout above.


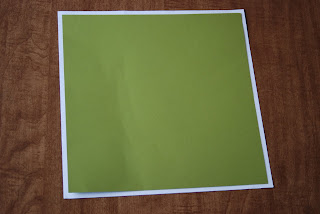
Now put the paper that you are planning to be in front of the page (green) into the trimmer. Cut one inch off one side and turn the page 1/4 th a turn and cut one inch off that side. Now the paper will be 11X11 inches square. Put adhesive on the back around all sides and center on the background 12X12 inch frame.


You will have a 1/2 inch border around your page. If you want a smaller border, cut the front piece (green) down by 1/4" on the 2 sides instead of 1/2". If you want a larger border, cut more off, like an inch off the 2 sides.

I don't know how my paper got so wrinkled but my 14 month-old granddaughter has been visiting and she is into EVERYTHING! We will blame it on her (like we have pretty much everything else this week).


This is the back of the page. It is best when adhering the 2 papers together to put the adhesive on the smaller (green) paper. If you put it on the background paper you may put it too far out into the border area and then you will have to clean it off, plus, it won't be over where you need it to hold the 2 papers together.

Clear as mud? LMK if you have questions. If you are still reading, I think you deserve some blog candy. I will choose from everyone who posts a comment and the winner will get a set of 5 fantastic homemade cards!

Wednesday, March 18, 2009

Scrapbook layout sneak peek


I know, I know, you probably hate it when I do this! I'm doing 2 classes tomorrow so I'm going to give you a sneak peak at the layout I'm doing tomorrow night.

I'll also show you the whole picture of one of the cards we are making in the other class though. I'm leaning toward doing the blue card, what do you think? I really love the patterned paper that is free in the Sale-a-bration catalog. It is such a great paper for spring layouts and pretty much any kind of card.


Sale-a-bration ends March 31. LMK if you want to take advantage of the free stamp sets, paper or ribbon. You can look at the free goodies in the catalog that is on the right column.

Saturday, March 14, 2009


Here are 4 cards I got in a swap last month. They are simple cards yet they are great. Sometimes I think I do too much on my cards and scrapbook pages. If I didn't try to use 17 techniques on every page I might get some albums finished!
I like the one that they cut in the shape of a little dress. The ribbon around it that looks like it was tied around an empire waist is just the perfect finishing touch. The scalloped circle punch at the neckline and scallops punched on the sleeves and hem are quick and easy and add so much to make the little dress look great.

Wednesday, March 11, 2009

Stamp meeting Saturday

I went to a Stampin' Up team meeting Saturday and we learned a lot and did some fun projects. We also did a card swap. One of the things my upline did was give us part of a birthday scrapbook kit and told us to do 2 pages in 15 minutes. Panic!!! Talk about pouring on the stress. My brain seemed to immediately drain of all creativity! I managed to put 2 pages together that aren't great but weren't half bad either. I'll plead temporary insanity.
We didn't have ribbon, buttons or brads so they are a bit plainer than my usual but hey, I discovered you can do pages without those things. On the other hand, I'll probably add some when I add pictures.

On the second layout I made a border with the white paper and layered green on top of it. If you cut out the middle of the bottom (white) layer you will save paper. A lot of you probably already know how to do this but I thought I'd show how to do it for the ones who have never tried this.

First, I put the paper I'm using for the piece behind (white) in the trimmer, 11" in and cut from 1" down to the 11" mark. You don't cut all the way through the piece, leave an inch at the top and the bottom of the page connected. I turn it a quarter of a turn and keep turning it and cutting until all 4 sides are cut. I hope that makes sense. You should have a 10X10 square cut out of the center of your cardstock. Then instead of that large piece of cardstock being hidden by the top cardstock, you can use it elsewhere on your page like I did the background squares for the cupcake stickers.

For the top piece, decide how wide you want your border to be. On the white with green layout I made the border 1/2". For the 1/2" border, cut 1" off of the top and one side of your second piece of cardstock. For a 1/4" border, only cut 1/2" off the top and side of it.

Put adhesive around the outside edges of the second (green) piece of cardstock and center it on the 12X12 frame (white) piece.

Sunday, March 8, 2009

Such Concentration!


I love these pictures I took of the grandkids Friday night. They were over here and, naturally wanted to play with grandma's "toys". I had been putting the layout together for my class Thursday night and the supplies were in the kitchen.

They looked so serious about their project. Christina kept saying she wanted to use the Big Shot machine so they both had fun with that. Then they had to have lots of adhesive to attach the diecuts to their page.

Notice the date on the bottom picture? I need to figure out how to reset it, none of my grandkids were even born in 2000!


Tuesday, March 3, 2009

Dry Embossing Technique


Here is a card I'm making for a swap. The only thing I did at the crop Saturday was make 3 of these cards. Very productive, huh? Hey remember, I also taught a totally goofed up class!


Have you ever done dry embossing? Some dry embossing uses a brass template. The straight lines on the pink cardstock at the bottom of this card is done using my trimmer, hey cool, something we already have! You could use the scoring blade with your trimmer but I always push too hard and tear my paper so I use the bone folder and just push my blade all the way to the top out of the way. Actually, sometimes I take the blade all the way off so if I get distracted I won't accidentally grab it and cut the paper instead of score it!

The picture looks amazingly normal even though I had to hold my camera upside down to take it with my left hand. Oh, the things we do for our blogs! I had to flip the picture when I edited it.


I am making 15 of these cards for a swap so I embossed some whole sheets of cardstock and cut it into 8 strips measuring 5 1/2 X 4 1/8. I attached a strip to the bottom of a white card front and inked it. Be sure the ridges are up when you adhere it. When you ink the embossed strips it looks like bead board, I really like it. I found it easier to ink the strips after I adhered them to the larger piece.


I think I showed in a previous post how to punch using a border punch. It is so easy when you can line it up and match the design with the printed design on the punch.


I also found it easier to ink the punched eyelet border piece after I had attached it to the inked patterned paper.


When you use a stamp set with a punch you just stamp the image and then insert it into the punch holding the punch upside down. Then you can see the image and line it up so you can punch it where you want it.

An easy way to get a knot on your card is to attach the ribbon around the back and take a small strip and just tie it around the attached ribbon. I used green on this card but I also used the black gingham on some of them which you can see in the picture at the top. I can't decide which color I like best, what do you think? I wonder how pink would look - overkill or perfect??? Maybe I'll do that tomorrow when I will hopefully have time to finish the swaps.

Gotta run! I hope you enjoy this card, even with the terrible photography! I'll have to retake several of the pictures tomorrow.

Monday, March 2, 2009

Occasions Mini Catalog preview

Stampin' Up's mini holiday catalog preview has been released today for customers, well, 3 pages anyway. The Easter sets are being offered early since Easter comes so early this year. Just click on this link and it will take you directly to the occasions mini preview catalog (pages 11-13) on my website. http://www.stampinup.net/uploads/fckeditor/stampinup/File/March%2009/pg11-13_Occasions_09_US.pdf Did you know that if you order directly from my website Stampin' Up will send you a full size (9.95 value) catalog free? Just click on the picture of the catalog on the side bar to go to my website.

Stampin' Up wanted to give the customer time to work on their Easter projects so that's why they are offering you a preview. The rest of the catalog will be available April 1- June 30. There are more great stamp sets in it as well as a few new products that are gotta-haves.

The sets that are available for pre-order are:

113196 An Egg-cellent Easter $21.95

113262 Wagon Full of Fun $34.95

113822 Eight Great Greetings $27.95

115421 Ocho saludos geniales (Spanish Eight Great Greetings) $27.95

114643 Huit souhaits sympas (French Eight Great Greetings) $27.95

113833 Egg Hunt Stampin' Around wheel $6.50

Let me know if you need anything!

Sunday, March 1, 2009

We Have a Winner!

I meant to post the winner of the Puns From The Past stamp set Thursday when we drew the name but my week has been so busy I have finally gotten a chance to sit down at the computer long enough to post. The winner is Lauren! Congratulations! Email me your address (wrightplace4@mindspring.com) and I'll send it on.

I went to a crop yesterday, again in KY but in a different direction from last week's crop. It was a fun crop, there were over 200 people there but we had plenty of room. There were about 12 long yard sale tables and those ladies love to shop! I sold over $100 of my excess scrapbook supplies! I had a couple of Sizzix dies that were $5 but everything else was $3 and under so I lightened my load a lot.

I also taught a class at the crop. I enjoyed it and the ladies were great although I forgot the MAIN stamp for the layout! I was teaching the layout that I posted on my blog on Jan 30. See the big flower and tall grass on the layout? That is the stamp set I forgot. I asked around a little and nobody at the crop had the set so we substituted but it was nothing like the intended one and I know they were disappointed. At least they learned the technique.

One of my ink pads was a little dry so I got the reinker and started reinking it. BE SURE THE TIP OF YOUR REINKERS ARE ON VERY TIGHT BEFORE REINKING AN INKPAD!!! I have reinked lots of ink pads and this has never happened but when I was rubbing the ink into the pad the tip popped off and ink went flying! I got it all over the front of my blouse, on the floor, the chair and the sample layout. Luckily I had the layout in plastic so it didn't ruin it. One of the class members had her layout half way on top of the sample and not a speck of ink got on it! At least ONE lucky thing happened in the class!

We left the crop early because of snow. (sounds like last week come to think of it) The snow was much worse this time and we were heading North. For those of you not familiar with the area, there is a big lake across KY and TN and the fastest way is to go around the top of the lake because it is freeway instead of across the lake on the long narrow bridges because the roads are also narrow and curvy. Anyway, we had to go North for 30 miles and it was terrible. Part of the time I couldn't even see the road because it was completely white. There were a couple of places where you could see that people had ran off the road. I had a white-knuckled grip on the steering wheel! I really hate driving on icy roads.
Once we got to the top of the lake and started heading East and then South the snow wasn't sticking to the roads as much and I could speed up a little over 30 MPH. It had taken us an hour and a half to get there and two and a half hours to get home! It was a long day but it was great to get home.
I hate to post and not include a picture. Since I didn't take my camera to the crop or take any pictures of the drawing for the stamp set I don't have one that actually goes with this blog post so I'll have to just post one of my favorites. This is my youngest granddaughter from a few months ago. She is really singing her heart out, isn't she!