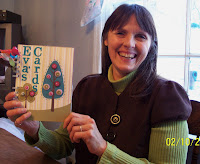
I think I mentioned a few posts ago that I had gone to a shoebox swap in Nashville with my Stampin' Up team sisters. I was waiting for a sunny day to take pictures of some of the projects we did. Here is one of my favorite cards, it uses the new Vintage Vogue set, isn't it georgous! I'm not sure who designed any of the cards so I don't know who to give credit to for the design.
I loved this set as soon as I saw it in the Occasions Mini Catalog. I bought the wheel but for some reason I've never gotten the stamp set. I reckon I need to change that real soon! This card in browns is just beautiful.
Another card we did was this beautiful easel card in purples. I love the easel cards, they are so nice to display. You like to think that when you send a card it will be treasured and displayed so the receiver can remember your thoughts long after they get the card.
This is my blog where I share things I create with my Stampin' Up products and stamps. I love to make cards, 3-D projects and scrapbook pages.
Monday, March 29, 2010
Saturday, March 27, 2010
Royal Blog Tour coming in April!
I'm on the Royal Blog Tour! It's launching April 30 through May 3. I'm so excited I've been chosen to be a Princess! I hope you'll become a Royal Tourist and ride along in a Royal Coach. Please come and visit my castle during the tour! For more information, please check out these links!
Website: RBT Website
Home Blog: RBT Home Blog
Thursday, March 25, 2010
Flowers, birdhouses and lots of rain, it must be Spring!
I remembered hearing that you could use the heat gun on some kinds of fabric and melt it a little for a different look. I know that acetate type fabrics are perfect for this so I decided to try it with some of the fun fabric I had bought for the class I had coming up with the Flower Folds die.
I like both pins but the melting definitely gives it a great look. I guess it depends on what look you want for the pin, soft and feminine or fun and funky. I used a stylus with a wooden handle to hold the flower down while I heated it up. You might end up holding a mighty hot handle if you use something that is all metal. Maybe not but I didn't want to take any chances! I'm including a close up so you can see the detail of the melty flower. Very cool.
Second, I wanted to share this picture of the little birdhouse I made at my Stampin' Up shoebox swap last week. It uses the adorable little milk carton die as the base. We punched a hole in front and covered that with a piece of the clear windows plastic and assembled the carton. After inserting some jelly beans I stapled it shut and added a scalloped edge roof and a bird punched from the Two-Step Bird punch. Quick, easy and a great addition to your Easter creations!
I had a great time at our monthly Memory Preservations Day crop. We worked on Easter goodies and visited and enjoyed being warm and inside on a rainy day. The rain was nice enough to let me get my car loaded and get there and get it unloaded without getting wet. When the crop was over I was just finishing loading my car back up when it started pouring rain! I figured it could just sit in the car and wait to be unloaded until tomorrow. The weatherman promises it will be sunny then. I was just glad my paper didn't get wet! We had a wonderful thunderstorm on the way home. The lightening was amazing!
I reckon I'll go to bed since so much of my stamping stuff is in my trunk!
Tuesday, March 23, 2010
St Patrick's Layout
OK, so we are a week past St. Patrick's Day. I made this layout with Stampin' Up's My Digital Studio. I used the pictures and journaling from the post on my daughter's blog on March 17th and I haven't gotten around to posting it yet. I love the excitement on the grandchildren's faces as they experienced the magic their parents planned for them.
The first page shows them setting up a trap to catch the leprechaun and includes a picture of the baby with that wonderful green wig. Page 2 shows the leprechaun's hat he left in the trap and the green shamrock shaped pancakes they had for breakfast that morning. Holidays can be so much fun with little ones around!
It probably took longer to do the shamrock border at the bottom of the pages than the rest of the layout combined. I tend to be a perfectionist about things like that and took a while tilting the shamrocks different directions. At least I could group them after I made the first one and cut and past them on the second page! It probably took about 20 minutes to do the whole layout.
I couldn't resist taking my camera with me to get the mail today. I took pictures of the row of buttercups along the driveway and the rose bush that is leafing out as well as the redbud tree and forcithia bush that are beginning to bloom. I also took pictures of the blue bells and purple and white hyacinthus.
I don't love every sign of Spring though. I killed the first wasp of Spring tonight. I have a huge fear of wasps and other stinging bugs. It's from a childhood trauma when I was about 6. We were outside playing and 8 bees got under my shirt. They were stinging me over and over as I ran across the yard trying to get away from them. My mom heard me screaming and ran to the door to see what was wrong. What she saw was my big brother chasing after me. That particular brother (yes, those of you who know him, it was Eddie) was known to irritate his little sister so Mom thought he was just "bugging" me again. He had seen the bees fly all over me and knew he had to rip my shirt off to let them out so they would stop stinging. I have been terrified of stinging insects ever since.
BTW, I didn't take a picture of the wasp after I cut him in half. That was my Mom's method of killing wasps and it works real well (as long as you are careful not to get stung).
Monday, March 22, 2010
Easter is Coming!
Did you realize that Easter is now less than 2 weeks away???? Maybe it isn't sneaking up on you like it is on me. I've been working on a few Easter projects that I wanted to share with you today. First is a little Easter basket made with the Scallop Square die. I've posted one of the purses I made but this little goodie is so quick and easy! You only use 5 squares instead of 19 so it doesn't take long to sew one up. Another Stampin' Up demonstrator named Sarah Stetler Miller made one that was so cute I just had to copy the idea! I haven't shabby chic-ed this one up yet but was excited to get a picture and share it. I love that I can use my Big Shot machine for sewing projects too, it makes it seem like a much better purchace that way.
Second is a little paper basket I made using the Fancy Favors die. The little bunny is punched from circle and oval punches and the carrot is stamped with the Trendy Trees stamp set. Yes, it is two of the tree tops stamped in green and orange! I got this idea from the Stampin' Connection website, a place where Stampin' Up demonstrators can go to find ideas and new techniques to share with their customers. It is a great benefit for demonstrators.
Speaking of which, the 15% off plus a free stamp set (up to a $47.95 value) ends on March 31st. If you've been thinking of joining Stampin' Up as a business or a hobby demonstrator, it doesn't get much better than that! Contact me if you want to discuss joining my team.
Last, an Easter card using the Beautiful Wings Sizzlet die and the Perfect PolkaDots texture die. It also featrues the Well Scripted sentiment stamp set and the FREE Scallop Trim Border punch. Don't miss out on Sale-a-bration, Stampin' Up's best sale of the year. It also ends March 31st. Contact me now to place an order or book a workshop. I don't have any openings this week but do have a couple of openings next week. I'd love to be able to give you free Stampin' Up products!
If you aren't familiar with Sale-a-bration, it is a once yearly sale that features free stamp sets with each $50 order. A hostess can also get a free stamp set besides her regular hostess benefits with each $300 in sales she gets at her workshop. My last hostess earned 3 Sale-a-bration sets, a hostess stamp set and $35 in free merchandise. She is going to feel like it's Christmas again when her order comes! Email me if you are interested: wrightplace4@mindspring.com
Saturday, March 20, 2010
Garden Giggles Card
I have been having fun playing with the Garden Giggles critters and made a card with one for a friend who is sick. I've got a few ideas for scrapbook pages too. These little guys are so adorable they might give my grandchildren some competition though!
Don't forget to sign up for the classes in advance so I can make sure I have a class kit for you. Remember, for the Garden Giggles class you will be making the 5 bags I posted Monday. There is still room in the Lacy Flower class and the Card Organizer class as well.
I used the Cottage Wall paper as the backdrop for this little bee. He is buzzing over an Orchid Opulence flower looking for something to help my friend get well faster. I hope just looking at the cute little bee will help.
Monday, March 15, 2010
Garden Giggles Class
Don't you just love these adorable little critters? They were designed by Gretchen Baron but I bought the instructions and with that purchace, I have her permission to teach the class! I'll be teaching the class twice, Friday, March 26 at 6PM and Tuesday, March 30 at 1PM. You will get a package of punched pieces to make the class quick and easy for you as well as the full 20 page, color instruction sheet. All 5 of these adorable little baskets will be taught in the class for only $20 or free with a $40 Stampin' Up order.
The Fancy Folds die that I used to make the flowers has 4 sizes of flowers on it. Since you use 2 layers of 2 different sizes you can make 3 sizes of flowers using the die. The largest flower measures 4 1/2" across and the smallest is 3".
The other classes I have left this month are fancy fabric flower pins, won't these be great for your Spring jackets or even to pin on an Easter hat? My granddaughter wants some on clips for her hair. Since they are quick and easy to make they are great for gift giving too. For the class, you will have several different fabrics to choose from. For a class fee of $10 you will be able to make 2 flower pins to add to your Spring wardrobe. This class will be March 23 at 1 or 7 PM.
The Fancy Folds die that I used to make the flowers has 4 sizes of flowers on it. Since you use 2 layers of 2 different sizes you can make 3 sizes of flowers using the die. The largest flower measures 4 1/2" across and the smallest is 3".
And the other class I'm offering is the Card Organizer book, Wednesday, March 31 at 1PM. It has 12 pockets for cards with a calendar on each pocket to keep up with birthdays, anniversaries, etc that you need to send cards for. The class is $15 or free with a $30 Stampin' Up order.
Let me know if you are interested in any of these classes and I'll send additional information. I hope to see you soon!
Friday, March 12, 2010
Same layout, different colors
First of all, business: I realized I still had the dreaded snowflake background on my blog so I changed it to a spring design. The flowers are a lot like some stamps that Stampin' Up has and I love the bright colors. I'm so excited to see spring come this year after that long, cold, snowy winter!
I managed to get a great picture of this tree budding out when I went to get the mail Wednesday. Rain was in the forcast but we got a gift of a beautiful day!
I love the Cottage Wall Designer Series paper for Spring layouts but I was afraid some of the ladies wouldn't be "into" purple so I made some of the kits with white backgrounds instead. I didn't put the butterflies on the second set and changed the Orchard Opulence background stamping to Old Olive but everything is pretty much the same on both layouts. I tried to take a picture yesterday when it was sunny but my camera was dead so I had to recharge it. Today is rainy so I couldn't get as good a picture.
How about these flowers? Guess what Stampin' Up punch I used to make them. I did the flower two different directions so the ladies could decide which way they liked best. I like them both but judging by the way I did them on the second layout I guess I like the pointy end out the best! I used a sponge dauber to add ink to the edges of the flower petals (and the letters in the title). I like the softer look this gives than the direct to paper method I usually use. You have more control with the sponge daubers too.
There are only 2 weeks left of Sale-a-Bration for this year, call me if you want to schedule a home workshop and I'll try to squeeze you in, I just have a few times available. There is no better time to get free stamps! If you want to place an order you can click on my website under the catalog on the right sidebar or email me and I'll help you with an order or a workshop. wrightplace4@mindspring.com
Happy Spring and thanks for reading! I reckon I'll stamp some on this rainy day :~)
Supplies used in layouts:
Lovely Letters alphabet stamps
Friends 24-7 stamp set
Beautiful Wings Embosslit
Two Step bird punch
Orchard Opulence, Whisper White and Old Olive cardstock
Cottage Wall DSP
Orchard Opulence and Old Olive Classic Ink
Clear Buttons
Sponge Daubers
Colored Buttons
Hemp Twine
Saturday, March 6, 2010
Card Organizer Class
We had so much fun at the Card Organizer class last month that I'm going to have it again this month. The card organizer is a great way to have your cards ready when you need them. There is a pocket for each month to slip your cards in and a calendar on the front of the pocket to write birthdays, anniversaries and anything other occassion for which you will need to send cards. For someone as forgetful as I am, this will help a lot!
We used the great paper from the Sweet Pea Designer Series Paper Stack. The pack is full of wonderful patterns and colors and is perfect for using to create the card organizer. We bound the finished pages into a wire-bound book so it can expand some to accomodate all the cards you are going to make to fill it with :~)
I will offer card classes throughout the year so you can build up your card supply and you can check my blog often for other ideas. I'm running a bit late getting my March classes posted. Frankly, Feb went by so quickly that March just slipped up on me when I wasn't paying attention! I'm working on some Easter projects and a card class. I'll get a picture of them posted as well as the dates of the classes soon.
Wednesday, March 3, 2010
Did you Ever CASE a card?
Most of my readers will know what CASE is but for the few who won't recognize the acronym, it stands for Copy And Share Everything. I cased this card from Sandy McIver, a very talented Stampin' Up demonstrator. I didn't have all the things she used so I substituted the stamp set but it turned out fairly close to her beautiful card.
I love the Very Vintage Wheel that is used on the bottom of the card. I wheeled it in Old Olive ink and then used a sponge dauber to age it some. I've used the Beautiful Wings Embosslit on many other projects, those embossed butterflies are so wonderful and with 5 butterflies in different sizes and designs, they are perfect for so many things. I used the leafy stamp from the Embrace Life set on the top of the card and also used the sponge dauber around that.
The second card was very loosely cased from a card by Michelle VanWiggeren. I took the basic element of the bird on the ribbon and the Modern Label punch for the sentiment but even the original creator of the card that was the inspiration for this probably wouldn't recognize it. That is they way casing goes. Sometimes you hardly change a thing and sometimes you only use an element or 2 as your inspiration.
I am a member of both the Late Night Stampers yahoo group. If you want to join, click on the owl in my side bar. Every week day Kelly posts the blog finds of the day. There are usually 15+ links to posts with great ideas. We put our creations on our blogs to inspire others, right? I often get great ideas from these links she shares. It saves me time and I discover some great blogs that I might not have found on my own. To make things even better, Kelli lives in Germany and when I wake up in the morning she has already got the blog finds posted so I can get inspired right away. I'm sharing 3 of my favorites with you from today's blog finds. Just click on the picture if you are interested and it will take you to the blog.
I really liked the idea of the oragami flowers. I guess because I'm wondering if my buttercups will EVER bloom! They have had yellow buds on them for 3 weeks but nothing yet. The temperatures are supposed to be above 50 for the next several days and sunshine is in the forcast so maybe I'll be including pictures of the first blooms in a blog post very soon. The crocus bloomed about the time I noticed the buttercup buds, such a brave little flower :~)
Next is a very simple yet georgous card using the beautiful Fifth Avenue Floral stamp set. Why, oh why haven't I bought this set yet? It's beautiful! And Melissa did a beautiful job with the watercoloring. I love Stampin' Up's watercolor pencils and crayons and I don't have that many stamp sets that are open for coloring. Humm, I need to take care of that "problem"!
The last card I'm going to share is just plain cute! I love how Andrea put the little chicks in the egg halves. This is one of the cutest Easter cards around!
I hope you enjoy the extra shares! I reckon I'll go stamp something. I hope the sun is shining wherever you are today!